0. 引言
网上已经有很多 Jenkins 集成 GitHub 的帖子,但是笔者在实践还是踩了不少坑,所以就重新总结一下。
本文分为上下两部分,上篇介绍 pr,下篇介绍 push。
1. 安装 Jenkins
先简要介绍一下 Jenkins 安装,详情参考 Jenkins 官网。
- ubuntu
$ wget -q -O - https://pkg.jenkins.io/debian-stable/jenkins.io.key | sudo apt-key add -
$ echo deb https://pkg.jenkins.io/debian-stable binary/ | sudo tee /etc/apt/sources.list.d/jenkins.list
$ sudo apt-get update
$ sudo apt-get install openjdk-11-jre
$ sudo apt-get install jenkins

# 笔者测试是跑在 docker 里的,所以 jenkins 用户需要 docker 权限
$ usermod -aG docker jenkins
- docker
#  注:笔者是在 ubuntu 上直接安装 Jenkins,所以 docker 上的用户要根据实际情况配置
$ docker run -u root --restart=always -d -p 8080:8080 -p 50000:50000 -v jenkins-data:/var/jenkins_home -v /var/run/docker.sock:/var/run/docker.sock -v /etc/localtime:/etc/localtime -v /path/to/jenkins-key:/root/.ssh --name jenkins jenkins/jenkins:lts
然后按提示完成 Jenkins 基础配置。
ubuntu 可以在如下文件更改默认服务端口,docker 的话直接改映射就行了。
$vi /etc/default/jenkins
...
# port for HTTP connector (default 8080; disable with -1)
HTTP_PORT=8080
...

$ sudo systemctl restart jenkins
如果要配置 nginx proxy 和 SSL 的话可以先参考这篇文章,笔者打算稍候尝试。
2. 连通 Jenkins 和 GitHub
这一步其实根据具体项目环境而异的,取决于你打算用什么用户来做桥梁。
笔者的做法是单独在 GitHub 创建一个 Jenkins bot 账号充当机器人的角色,这个用户不仅是连接 Jenkins 和 GitHub 的桥梁,也是自动将 Jenkins 消息发布到 GitHub 的用户。以下提到的『bot user』就代指这个 GitHub 的 Jenkins bot 用户。
创建完之后把 jenkins 用户的 SSH 私钥设置在 bot user 的 Settings > SSH Keys
此外,还需要把 bot user 加到项目合作者,否则它没有权限将 Jenkins 的消息写回 GitHub,Jenkins build 时会有如下报错:
FileNotFoundException means that the credentials Jenkins is using is probably wrong. Or the user account does not have write access to the repo.
用 jenkins 账号测试连通性
$ ssh -T git@github.com
3. 开始配置 GitHub Pull Request 与 Jenkins 的集成
-
获取 bot user 的 access token
GitHub bot user > Settings / Developer settings > Personal access tokens
至少需要勾选 repo 和 admin:repo_hook 两组权限:
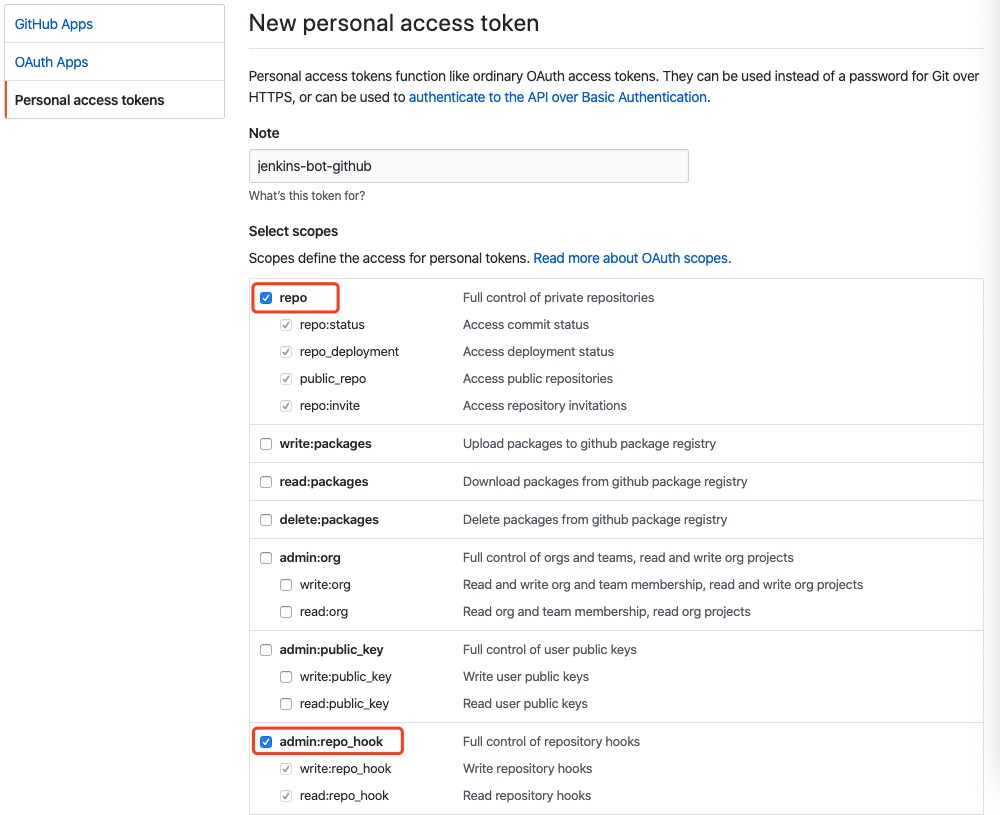
然后在 Jenkins 中配置该 bot user 的 credentials,用 secret text 填写 access token:
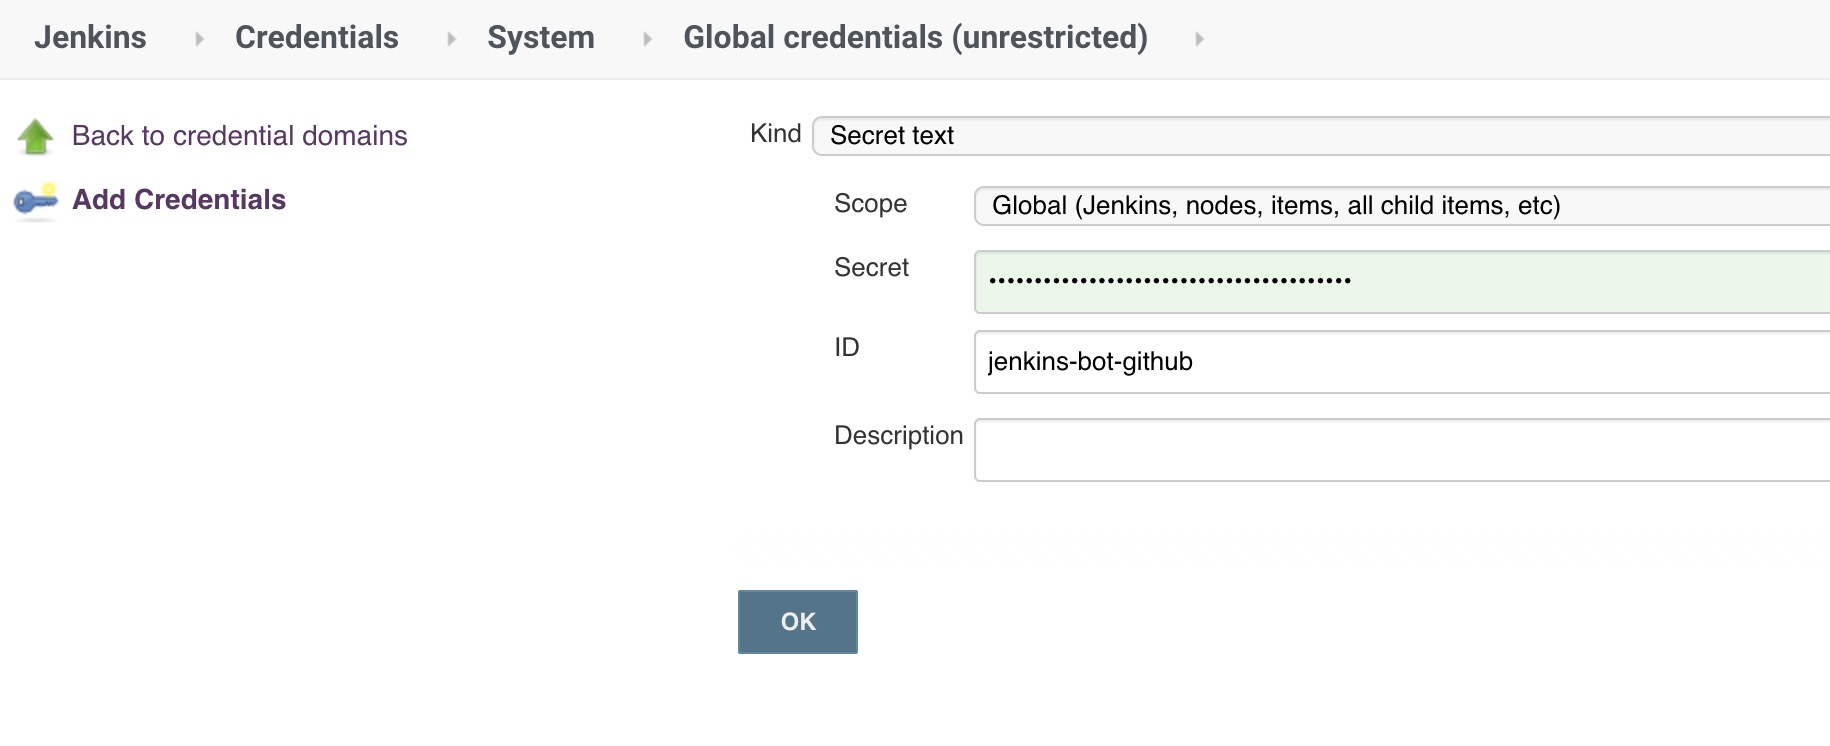
-
安装插件
在 Jenkins / Plugin Manager 中找到并安装 『GitHub Pull Request Builder』
-
配置 GitHub Plugin
接下来两步都在 Jenkins > Configuration 中完成。
配置 GitHub 如下:
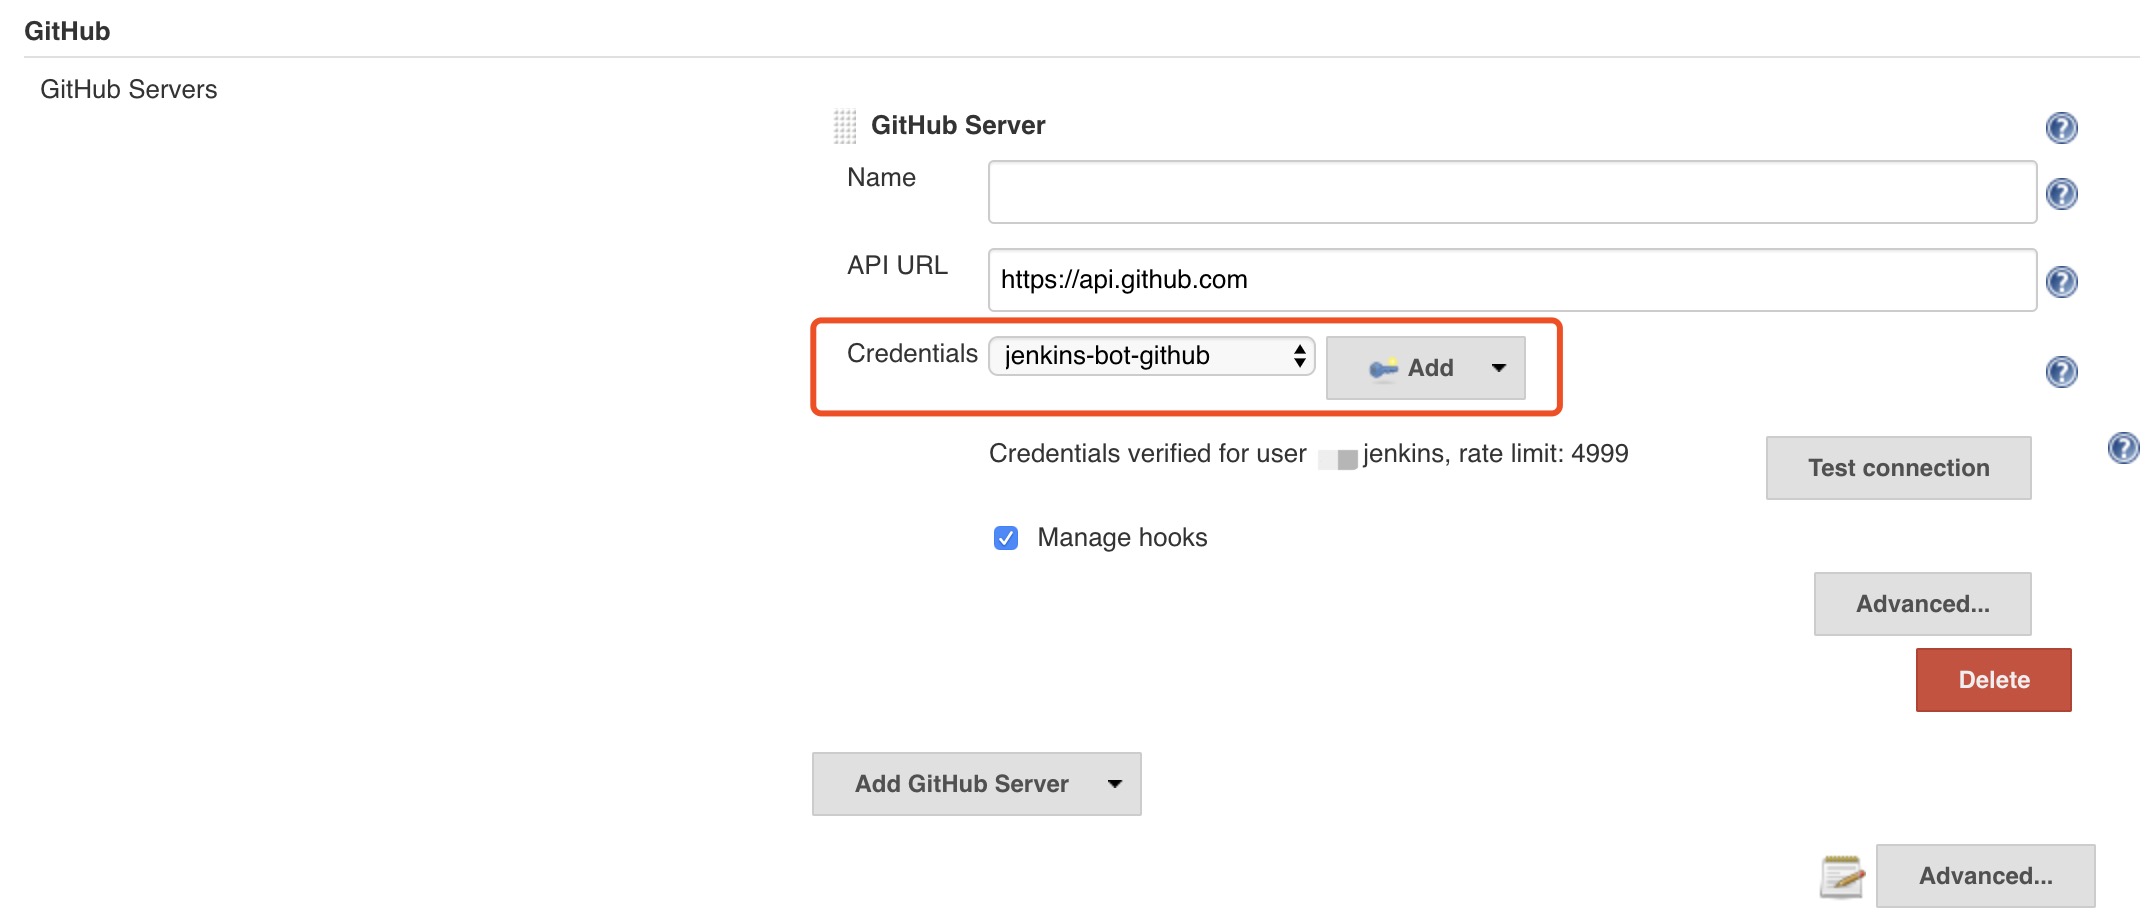
Credentials 选之前配置的 bot user,点击『Test Credentials』测试连通。
-
配置 GitHub Pull Request Builder Plugin
配置 Github Pull Request Builder 如下:
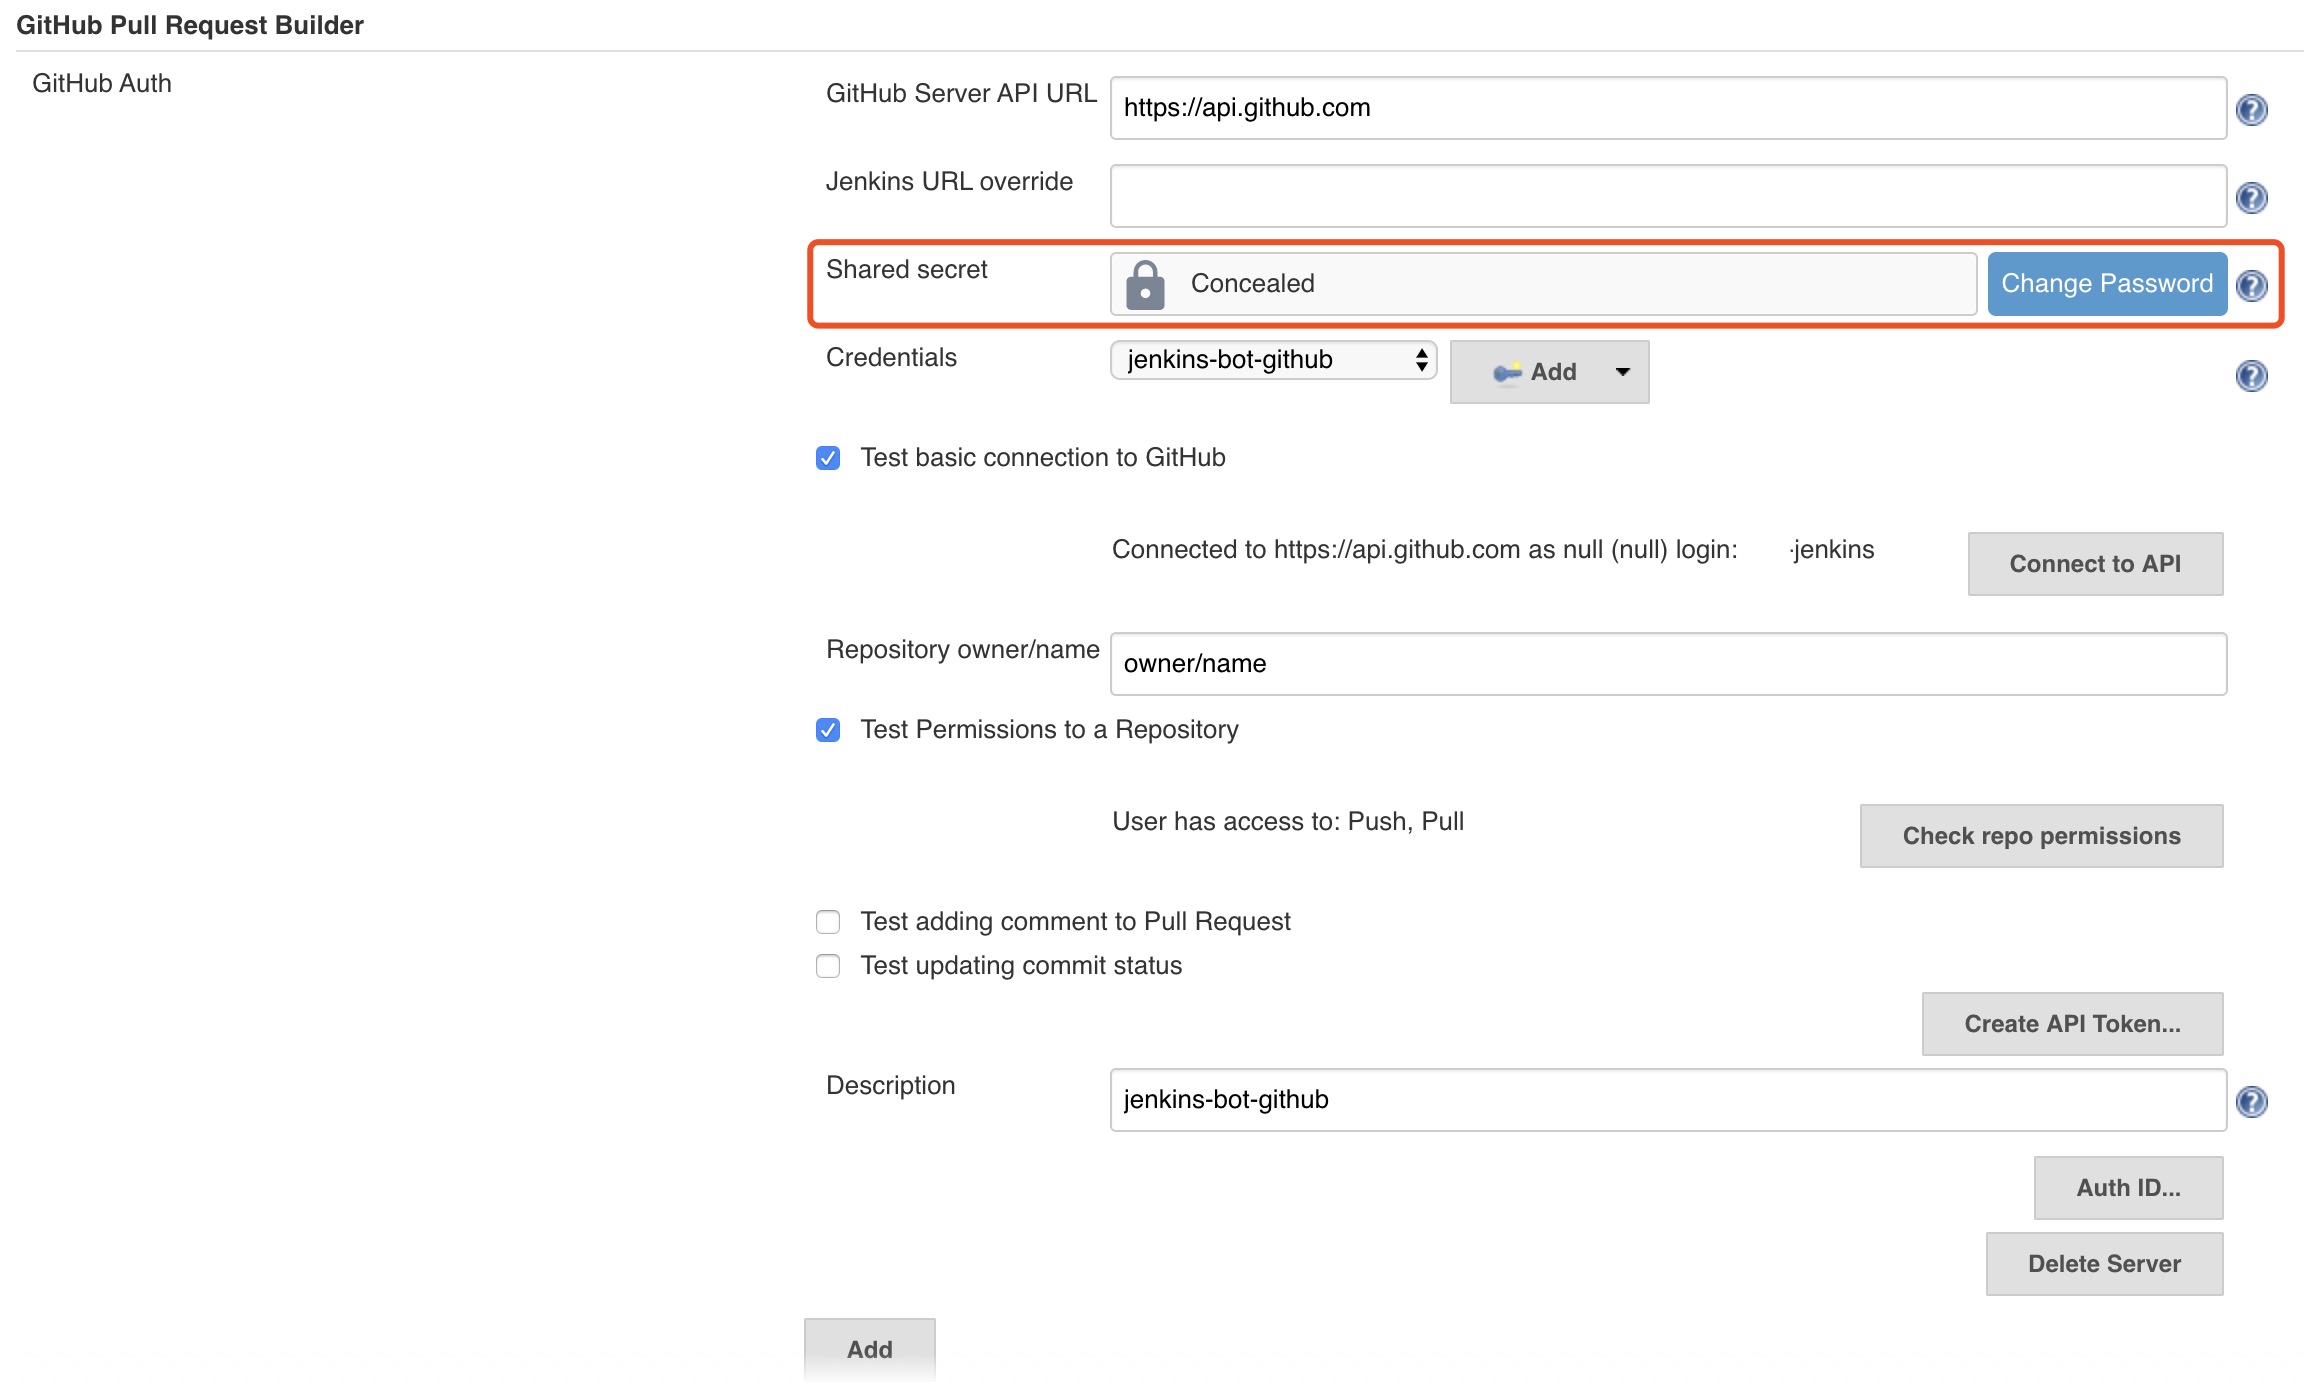
这里的 Credentials 就是在 GitHub 同步 Jenkins 状态的用户。
注意要配置这里的『Shared secret』,稍后会在 GitHub Webhooks 用到,这个 secret 会在每次 Webhooks post 中携带。
-
配置 GitHub Webhooks
在 GitHub 项目 Settings 的 Webhooks 栏目配置 webhook,注意如果是 pull request 请求要用 /ghprbhook/ 地址(注意最后的 ‘/’),网上很多教程配置的是 /github-webhook/,它对 push 是有效的,但是笔者测下来对 pr 是无效的。
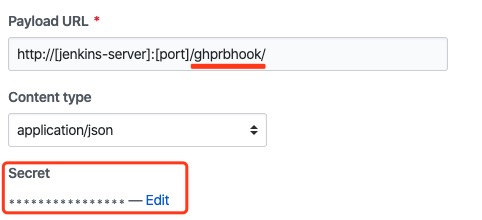
还有要注意配置 『Secret』,就是之前在 『GitHub Pull Request Builder Plugin』 里面设置的『Shared secret』,否则在触发 webhook post 的时候,Jenkins log 会显示如下错误信息:
SEVERE o.j.p.ghprb.GhprbGitHubAuth#checkSignature: Request doesn't contain a signature. Check that github has a secret that should be attached to the hook
最后在 『trigger events』 里选择 『Pull requests』如下:

4. 创建 job
- 创建 Freestyle project

- 填写 GitHub project
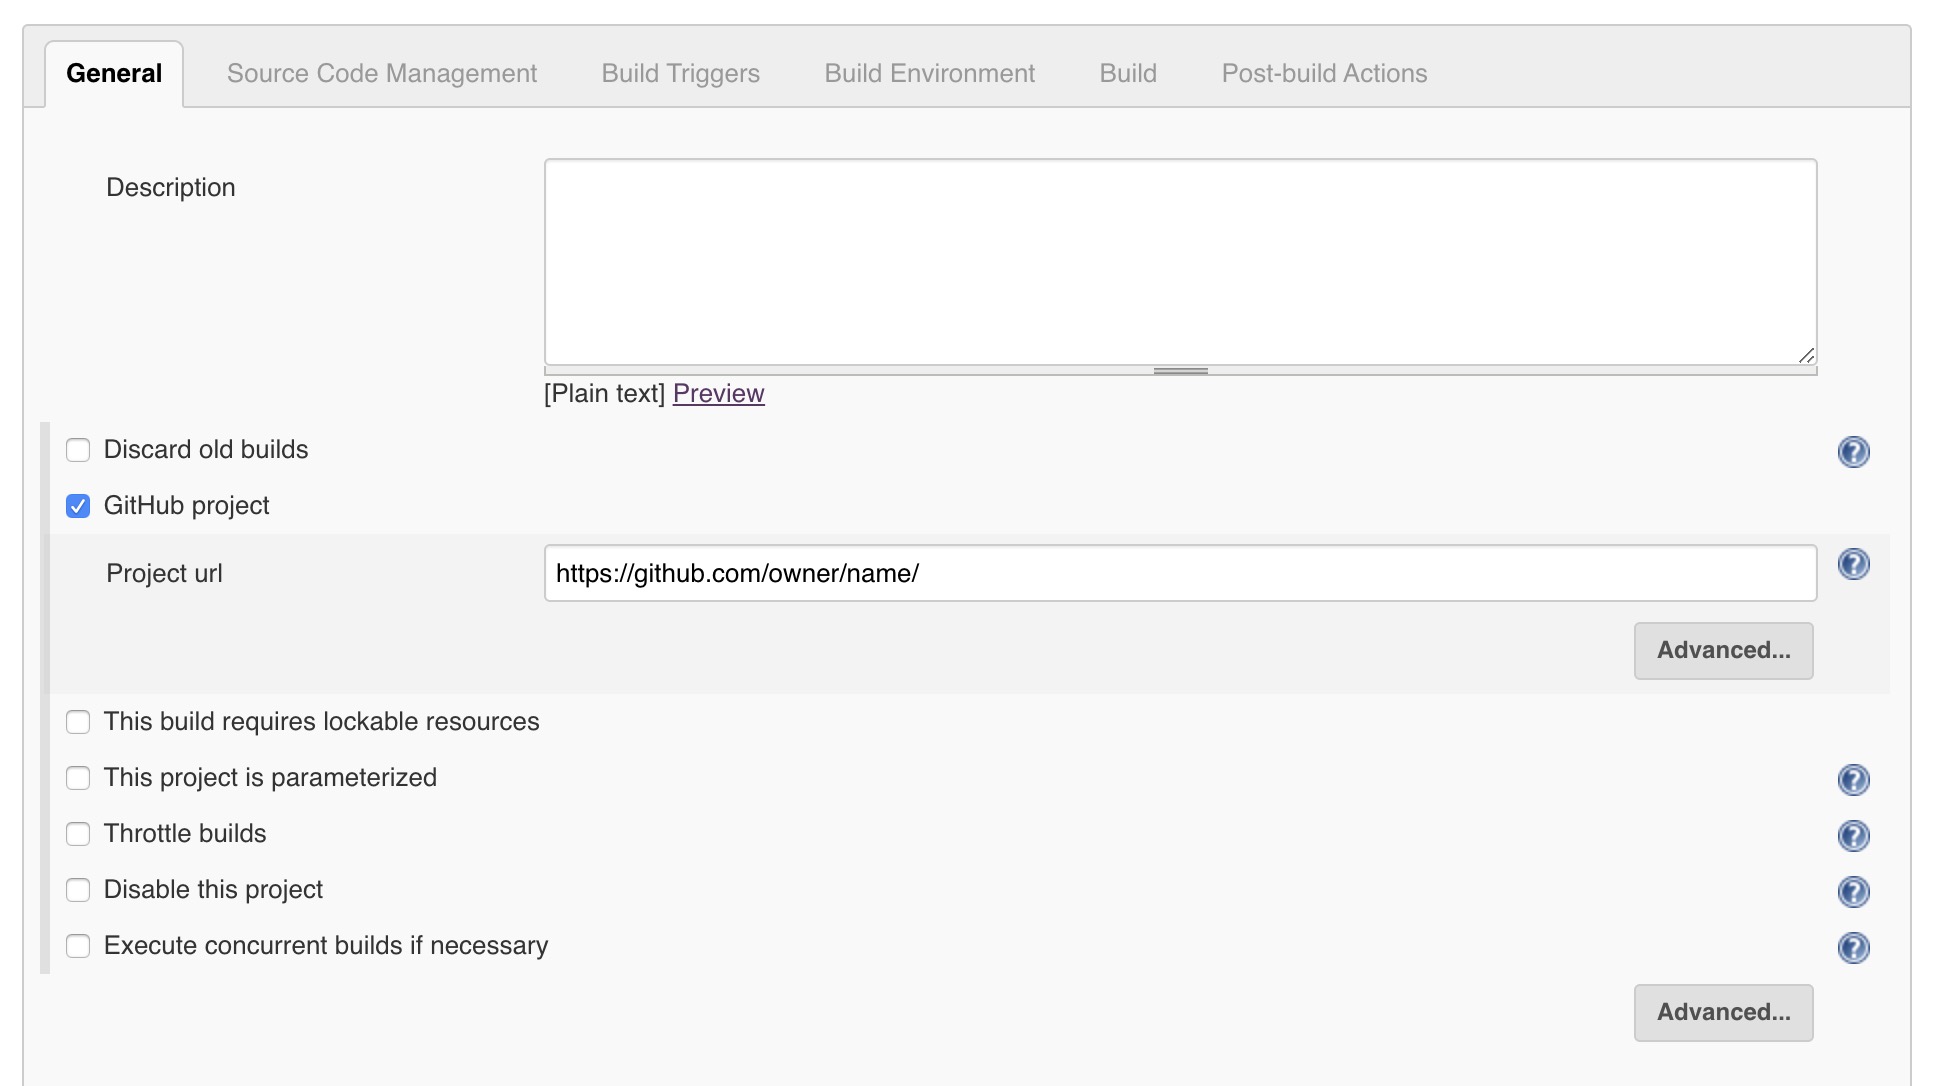
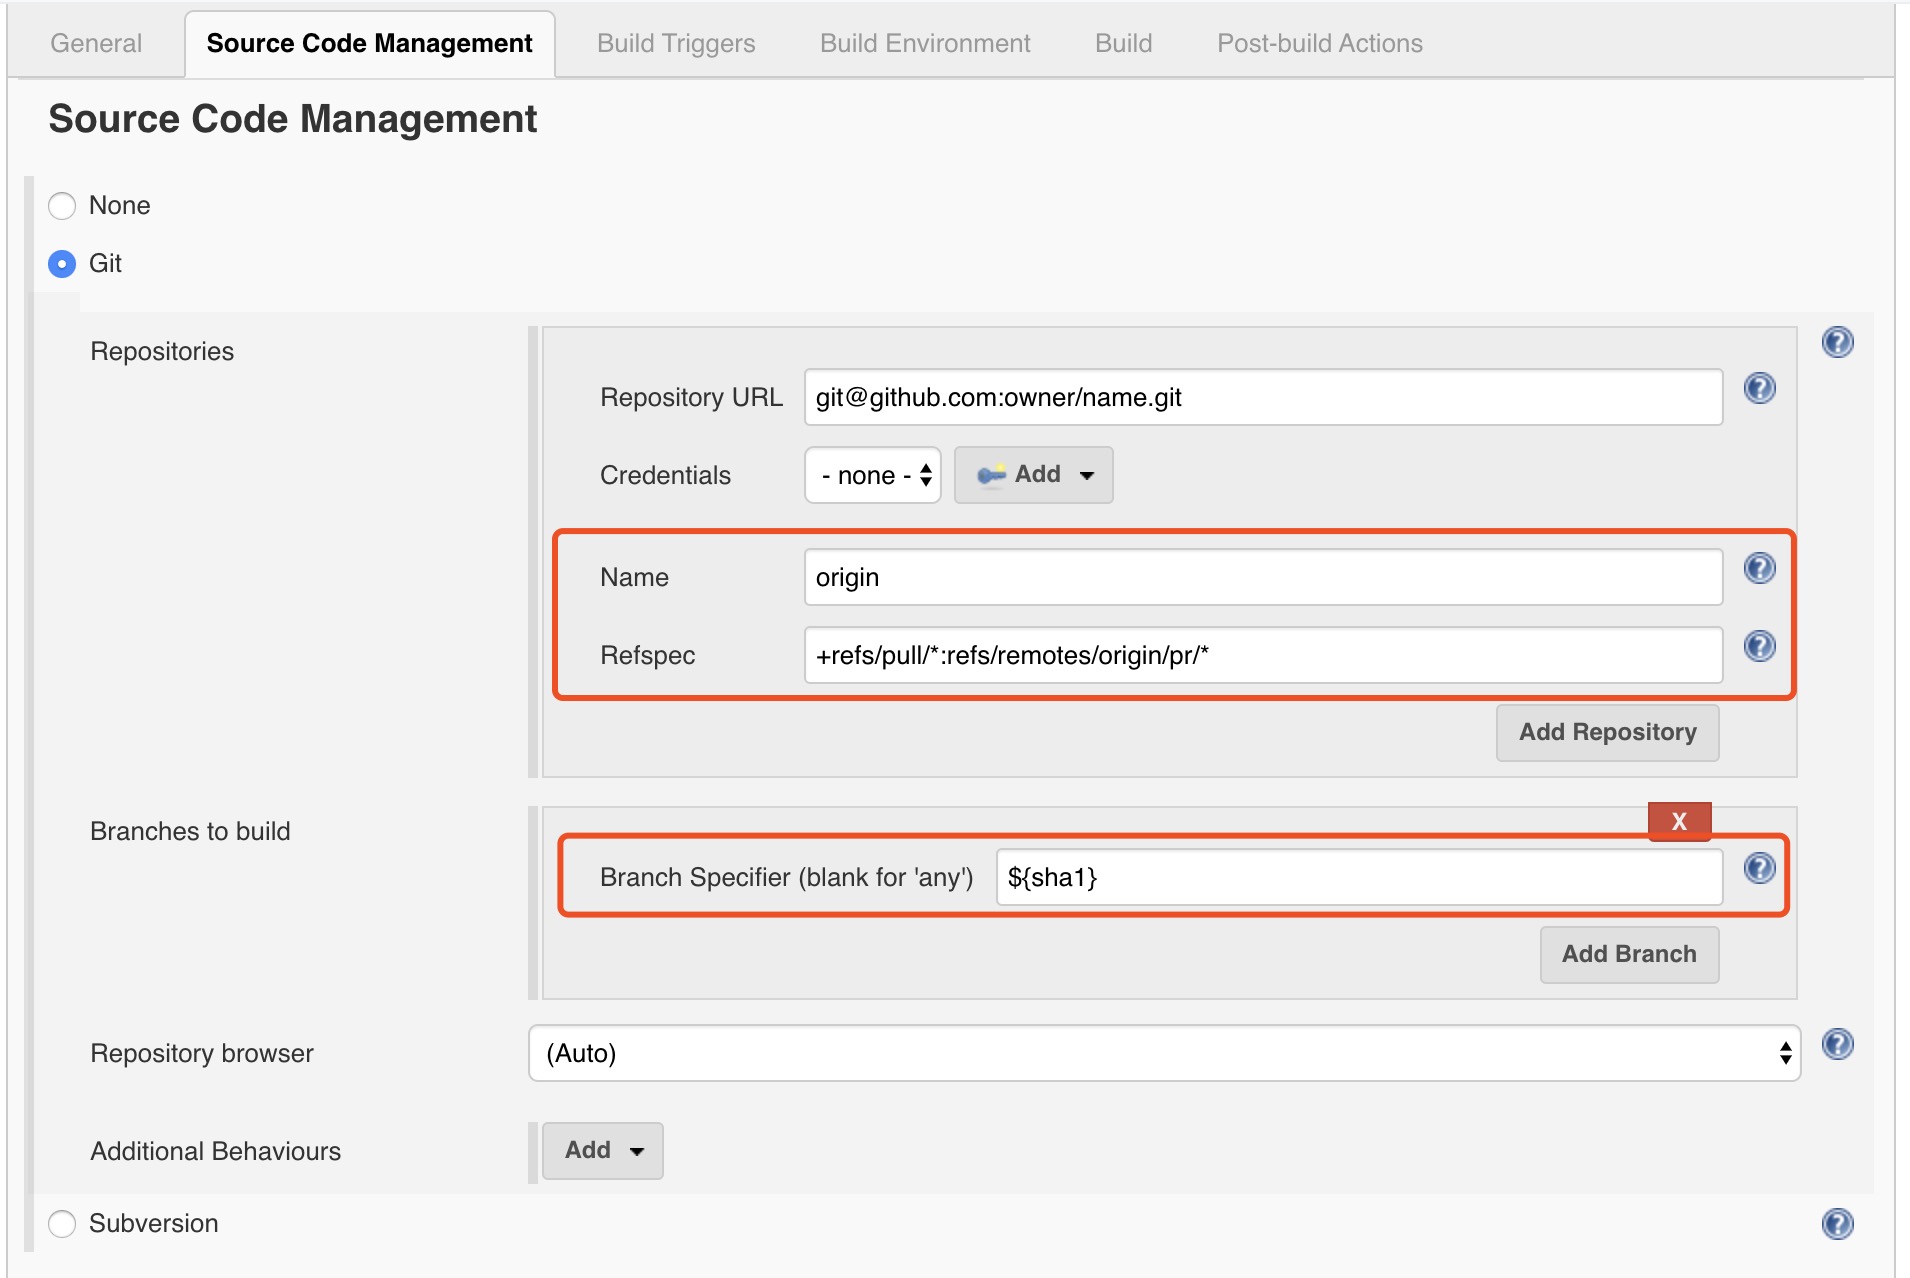
- 添加 Source Code Management
这里『Credentials』不用填,因为在第二步 jenkins 已经和 bot user 绑定了(要注意对于私有项目如果 bot user 不是合作者的话这里就会提示找不到项目,不过之前已经提过无论如何都要将 bot user 加到项目合作者)。
- 在 Build Triggers 中添加 GitHub Pull Request Builder
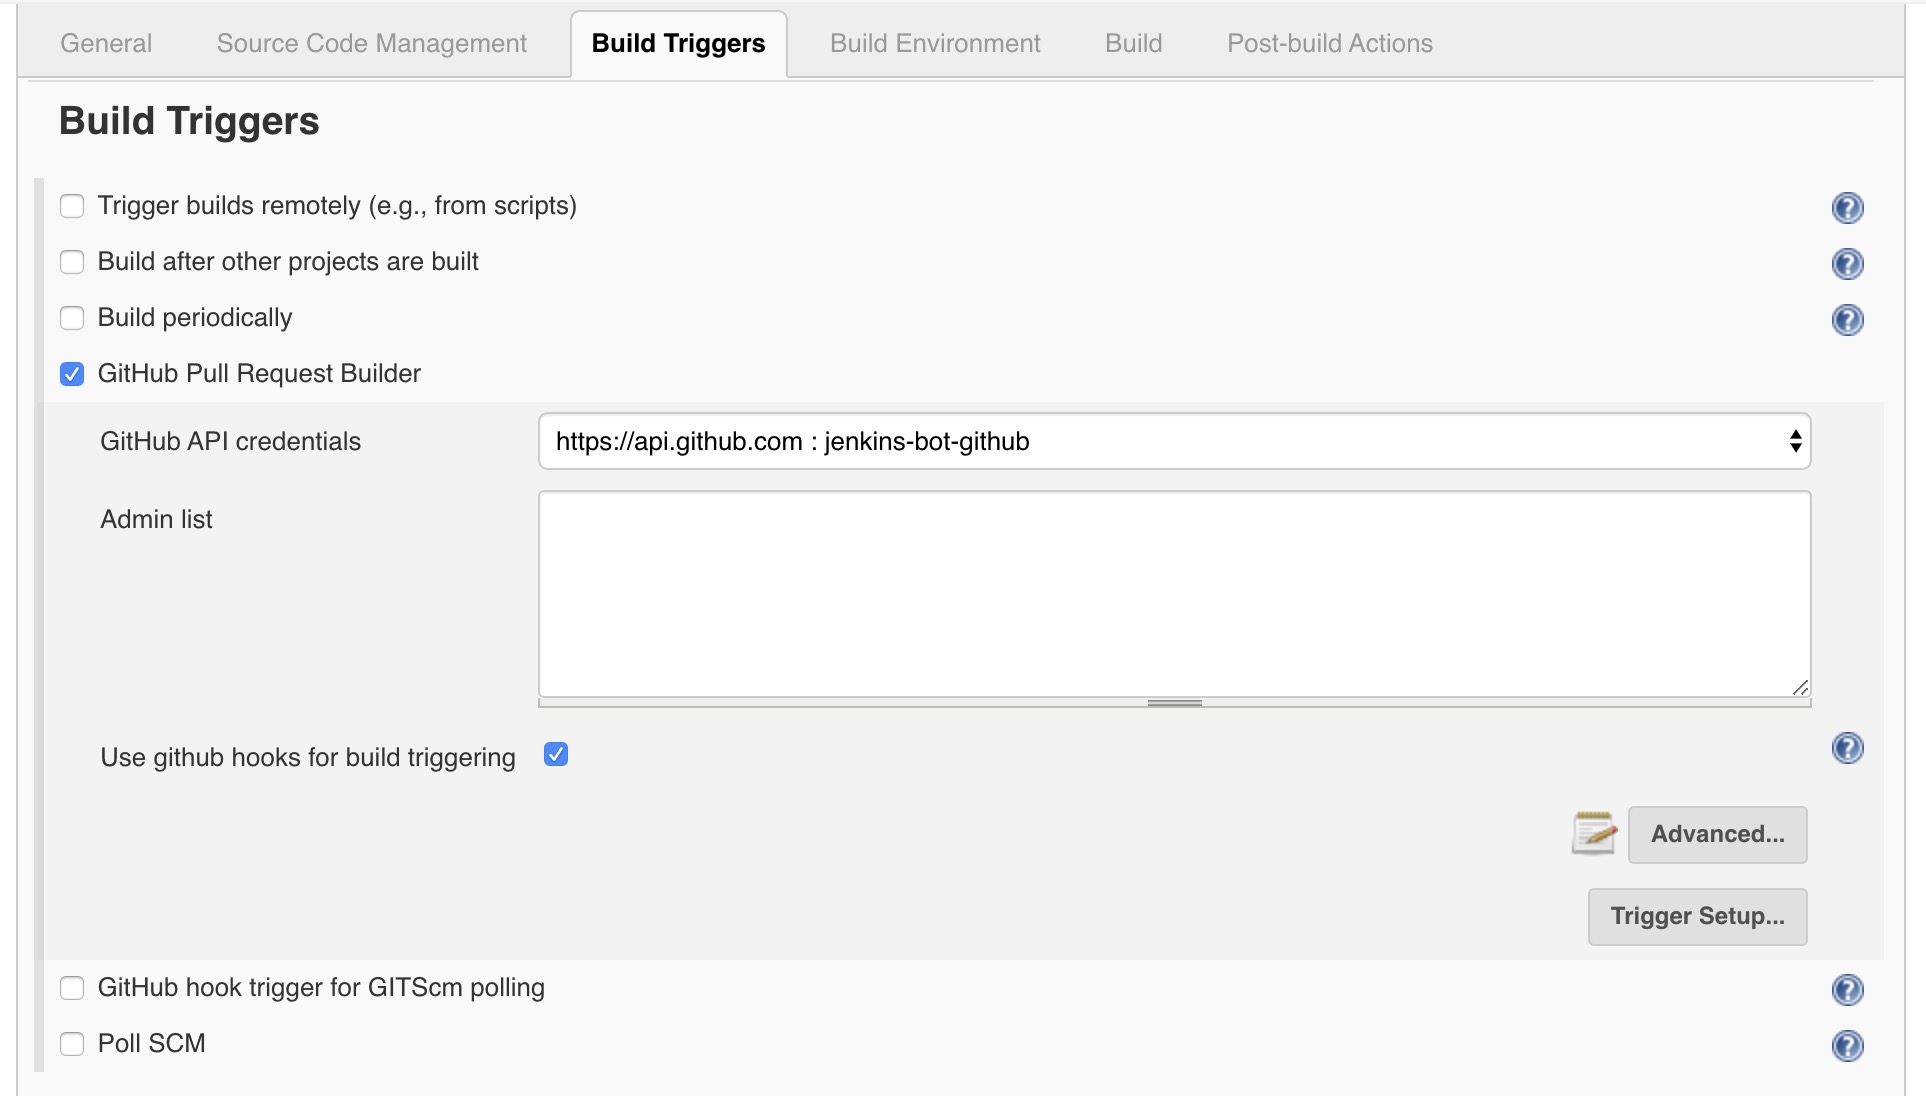
Admin list 具体作用不详,笔者测下来可以不填。
Advanced > White list 用来授权 GitHub 用户自动触发 Jenkins 构建,不在白名单的 GitHub 用户是不能自动触发 Jenkins job 的。但是如果勾选『Build every pull request automatically without asking (Dangerous!).』就不需要额外的白名单了,它会授权任意用户能进项目跑构建,慎用。
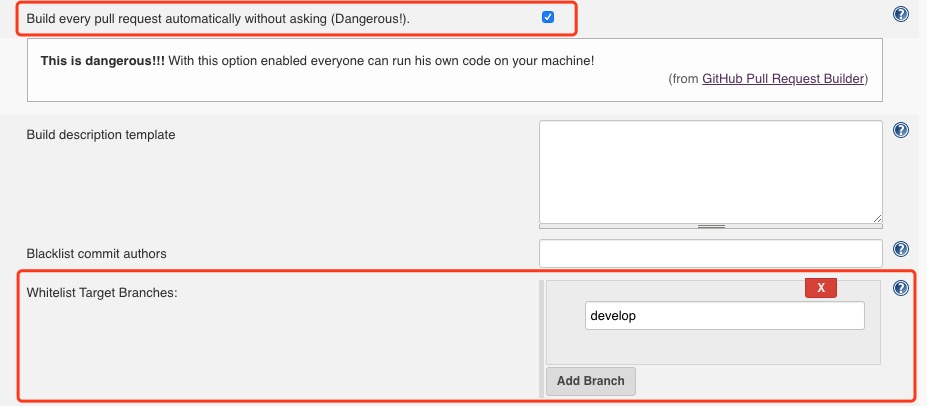
如果你需要限定 PR 自动构建的 branch,则配置『Whitelist Target Branches』为需要 merge 的目标 branch 白名单。
以上参考 Github Pull Request Builder Plugin 官方说明
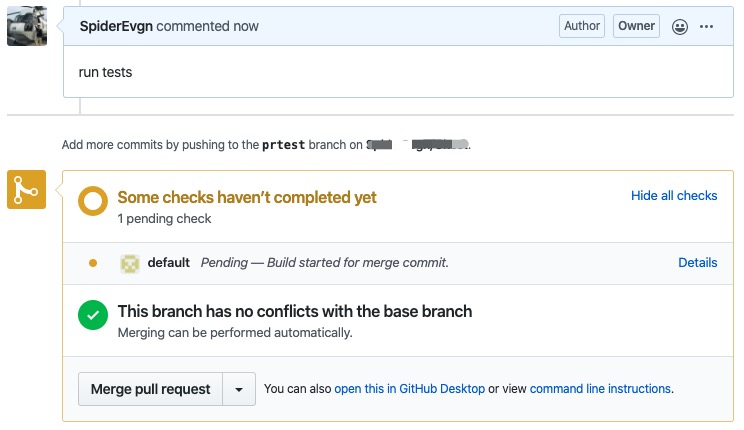
另外,『Trigger phrase』可以按照正则(java)来判断 GitHub PR 中的 comment 从而触发 build,不过这个 trigger 要配合 webhook 的『Issue comments』权限来使用。

比如配置:
Trigger phrase: .*(re)?run tests.*
这样提交 comment 也会直接触发 build 了:
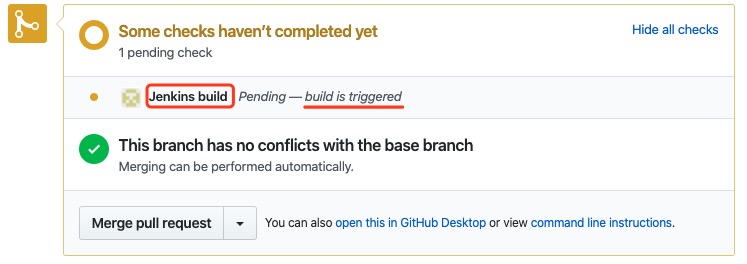
- 可以根据需要配置『Trigger Setup』,用来定制化显示在 GitHub 中自动构建的文字(也一步也可在
Jenkins > Configuration中全局配置 ):
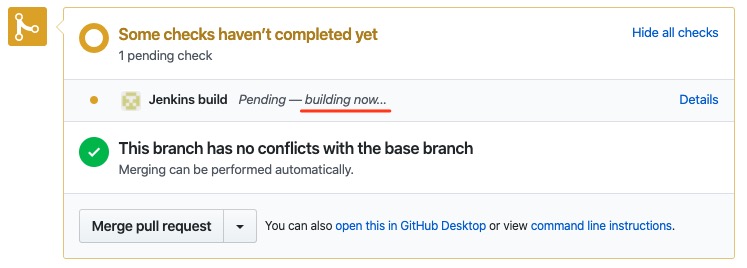
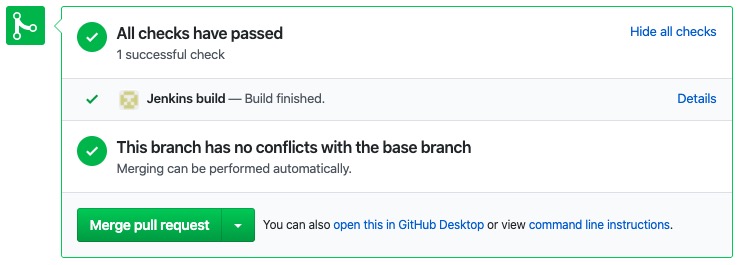
具体的 Build 过程就不介绍了,测试的话创建个简单的 shell command 即可。
5. 颜色输出
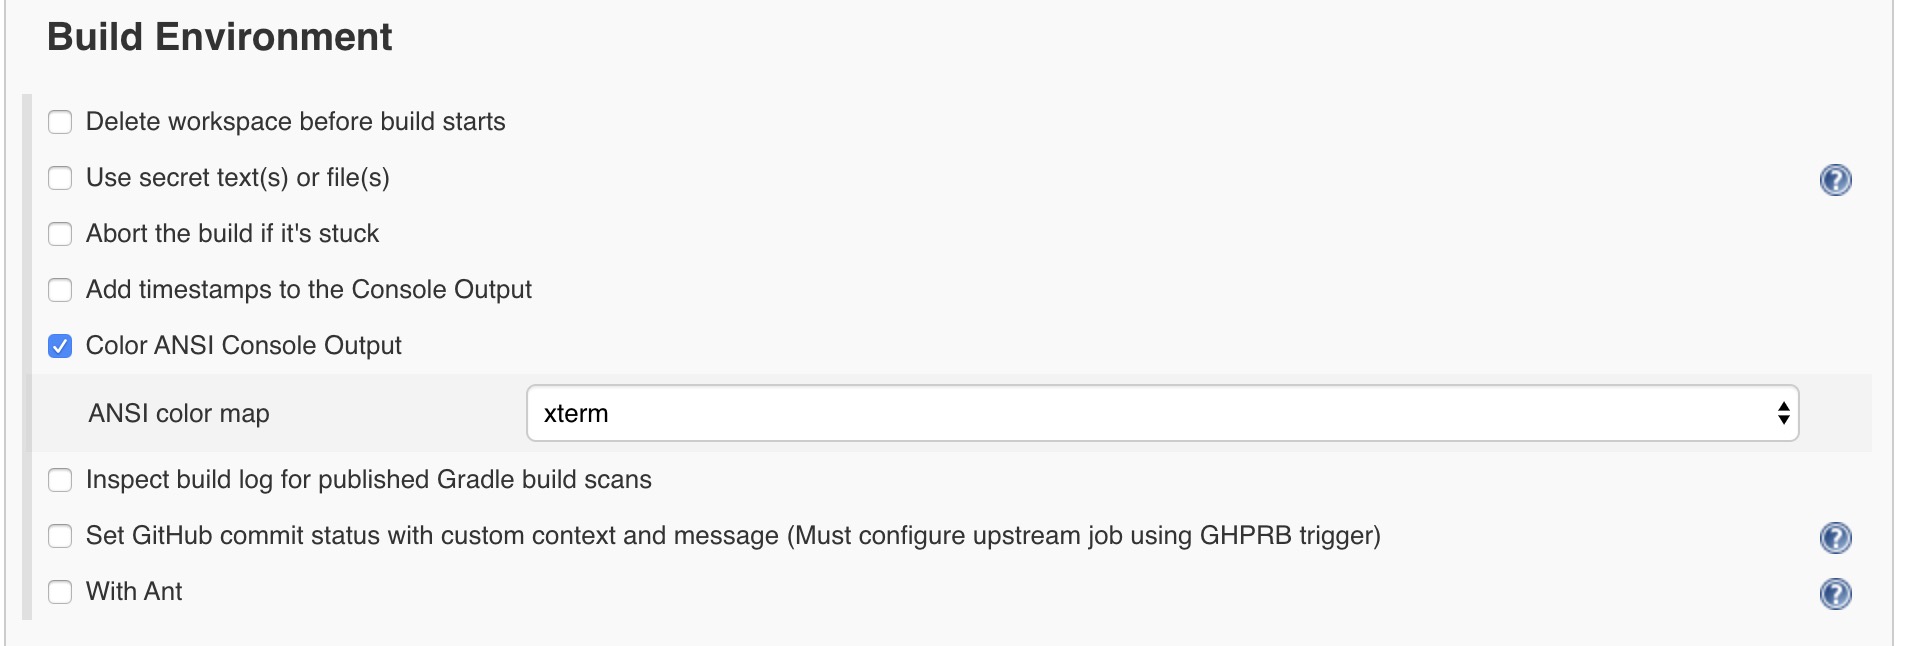
最后补充一点,Jenkins 的 console 输出也是可以上色的,参考Ruby China 这篇帖子,安装 AnciColor 插件,然后在 Build Environment 配置就可以了。

